We recently released v2.0 of our integration with Microsoft Teams. It is a bundle of exciting features that helps users sign documents, and send signature requests—all without having to leave the Microsoft Teams ecosystem.
Technically, Microsoft Teams is known for its multiple points of extensibility. Today, Signeasy will be seen in the following extensibility points.
- Tabs
- Bots
- Messaging Extension
The Why
With this release, we intended to enter into the collaborative scope by integrating the Signeasy app within the team channels. The objective was to help users sign and send requests for signatures faster and collaborate more efficiently as a team.
The What
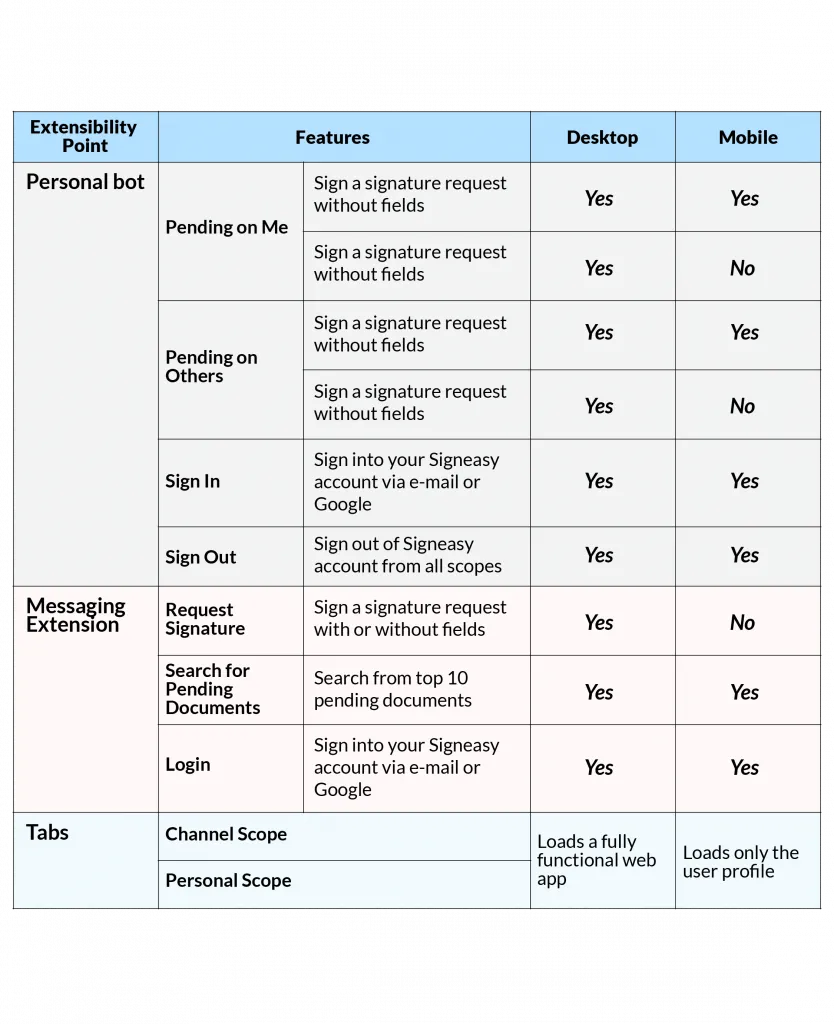
The following capabilities are supported by Signeasy for Microsoft Teams Version 2.0.
The Workflow
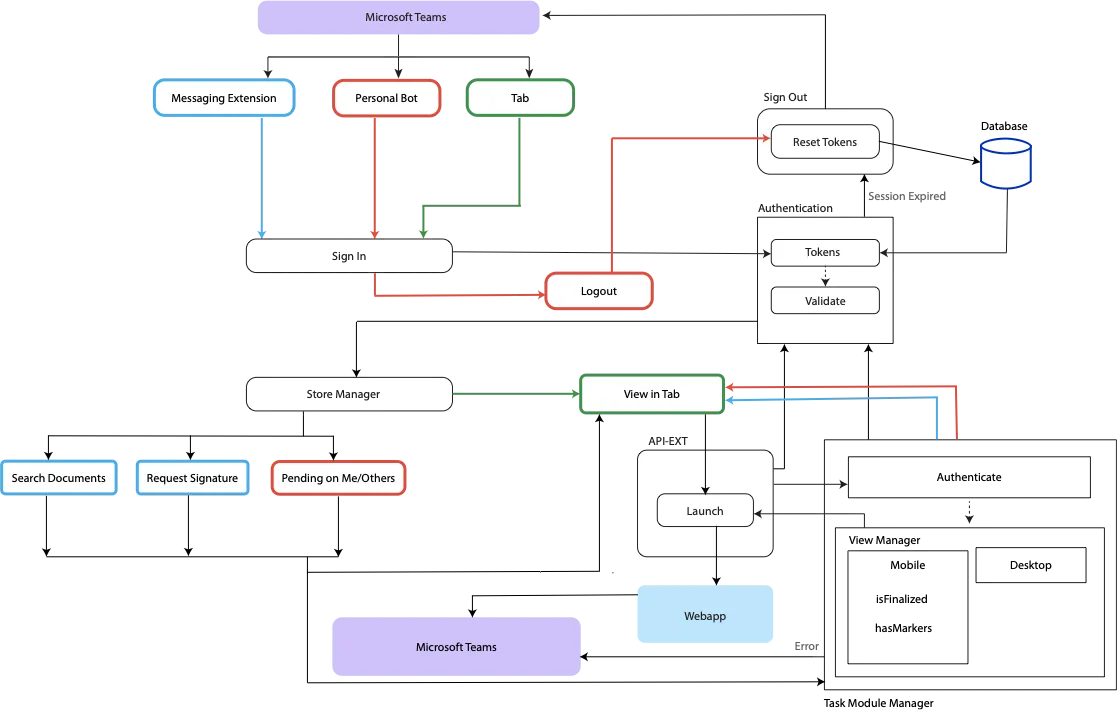
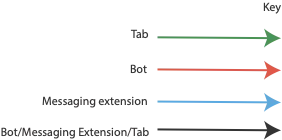
This diagram provides a snapshot of how the messaging extension, personal bot, and tabs are built.
The How
Let us take you on a journey about how we built this, and some key learnings on the way.
When it comes to building an application for Microsoft Teams, Every step in the process requires due diligence, for the application to run successfully. Here are a few key milestones we focused on, as we went about building the application:
1️) As recommended by Microsoft’s development guidelines, we store all configuration details in the .env file.
2) The application is built using the “build” Gulp task.
The “yoteams-build-core [https://www.npmjs.com/package/yoteams-build-core]” helps with building the project, and serving it in a ngrok-url, for local development. When the code is ready for production, gulp ngrok-serve is replaced with gulp serve. Both of these commands are supported by the yoteams-build-core library.
The gulp serve task runs easily in Docker Containers, too.
We have ensured we are working on the latest versions of npm, yo, gulp, typescript, and Git. However, we have limited ourselves to Node Version 14.18.
Here’s why: https://github.com/webpack/webpack/issues/14532
3️) To create the Microsoft Teams apps manifest, we run the “manifest” gulp task. This generates, validates, and finally creates the package (a zip file) in the “package” folder. The manifest is validated against the schema and dynamically populated with values from the `.env` file.
gulp manifest
The manifest file provided below, translates to the package com.signeasy.teams.extension.zip, with the gulp manifest task. This package needs to be uploaded into App Studio for local testing, or into the Microsoft partner center to publish the application.
All variables enclosed with {{ }} will be picked from the .env file, during the gulp manifest task.
4) The messaging endpoint has to be updated in the bot framework for both the messaging extension and the personal bot to work properly.
If you are using an older bot, follow these steps:
- Navigate to https://dev.botframework.com/
- Choose “My Bots”
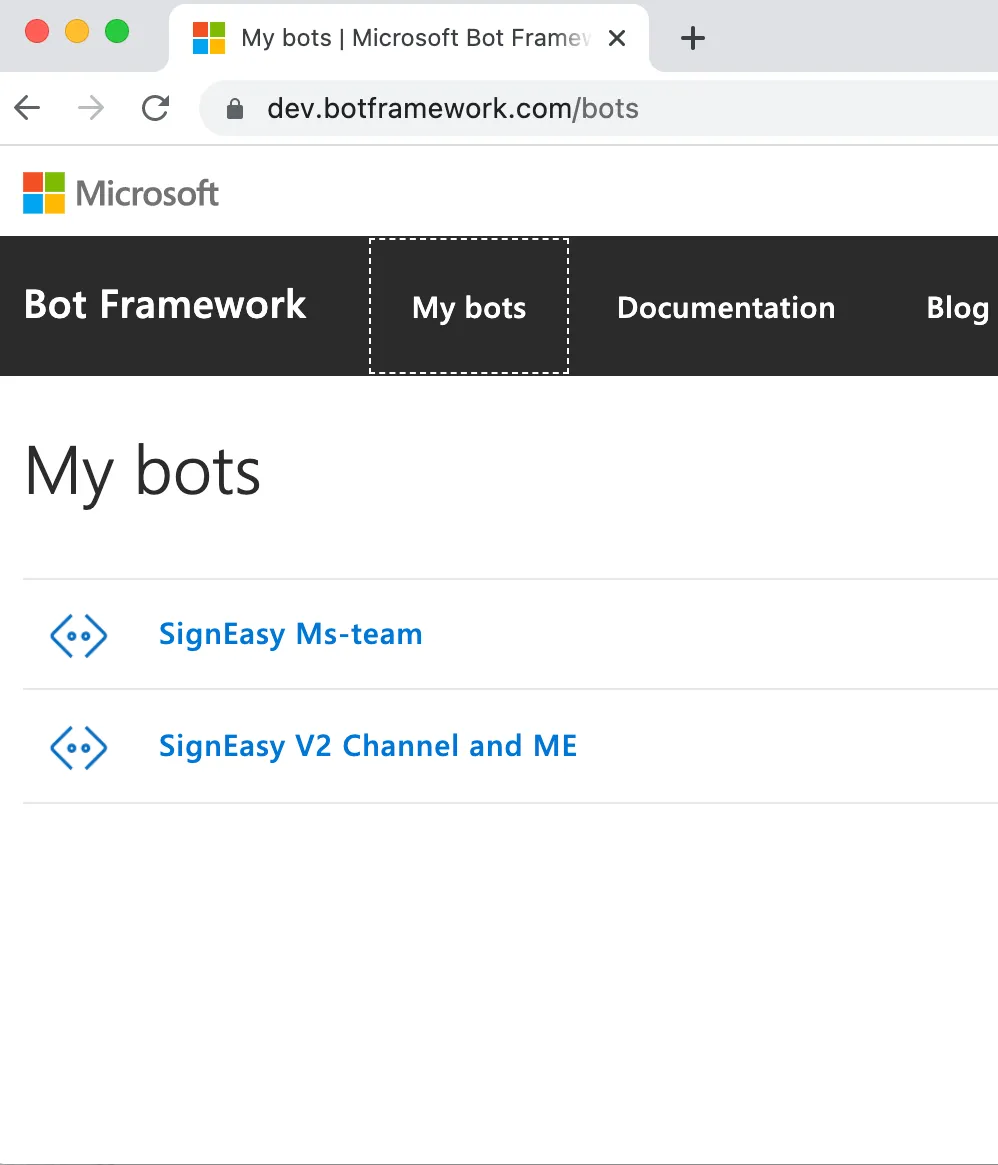
- Choose a bot and navigate to “Settings”. Here, the messaging endpoint should be in the following format. Ensure "Enable Streaming Endpoint" is enabled
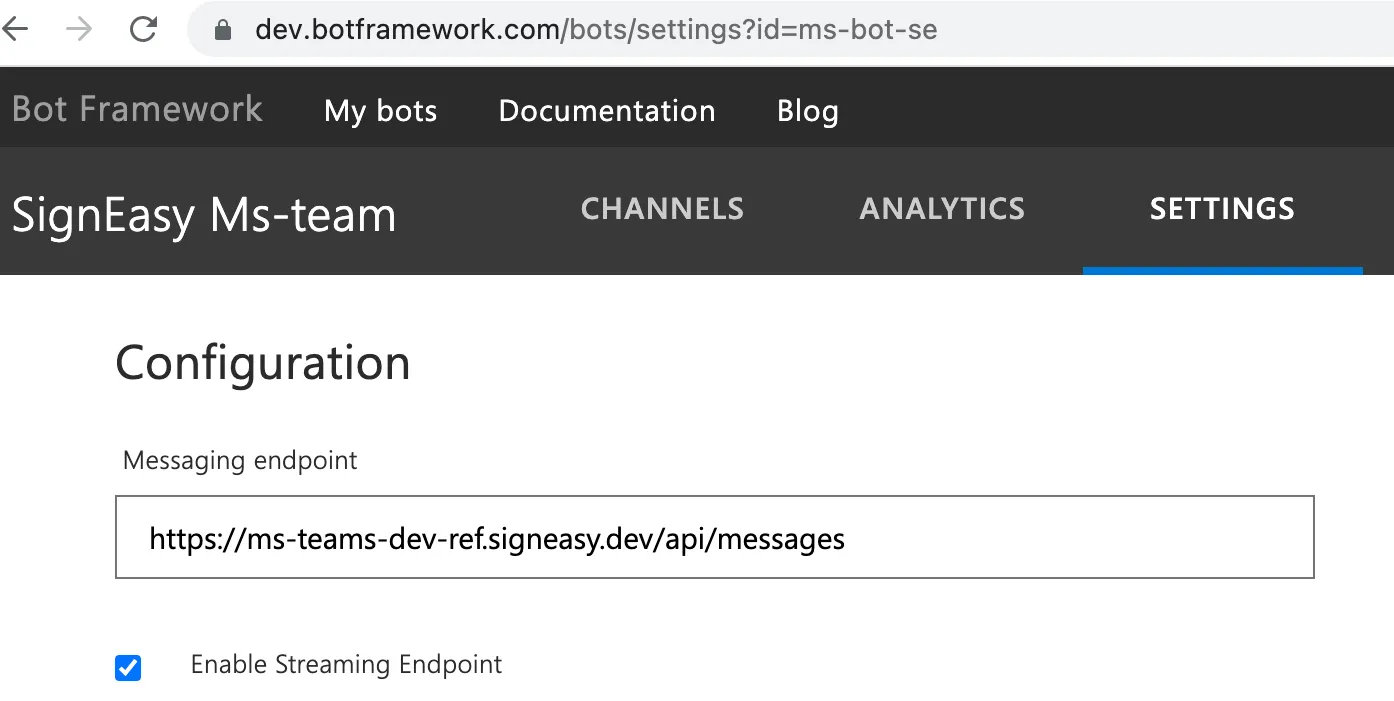
- Then, save.
If you are using a bot created via the Azure Framework, follow these steps:
- Choose your bot from the Resources.

- Choose your bot from the Resources, and modify the messaging endpoint.

- Apply the changes. If it doesn't apply immediately, click twice. It works 😉
A Developer’s Journey Inside Teams
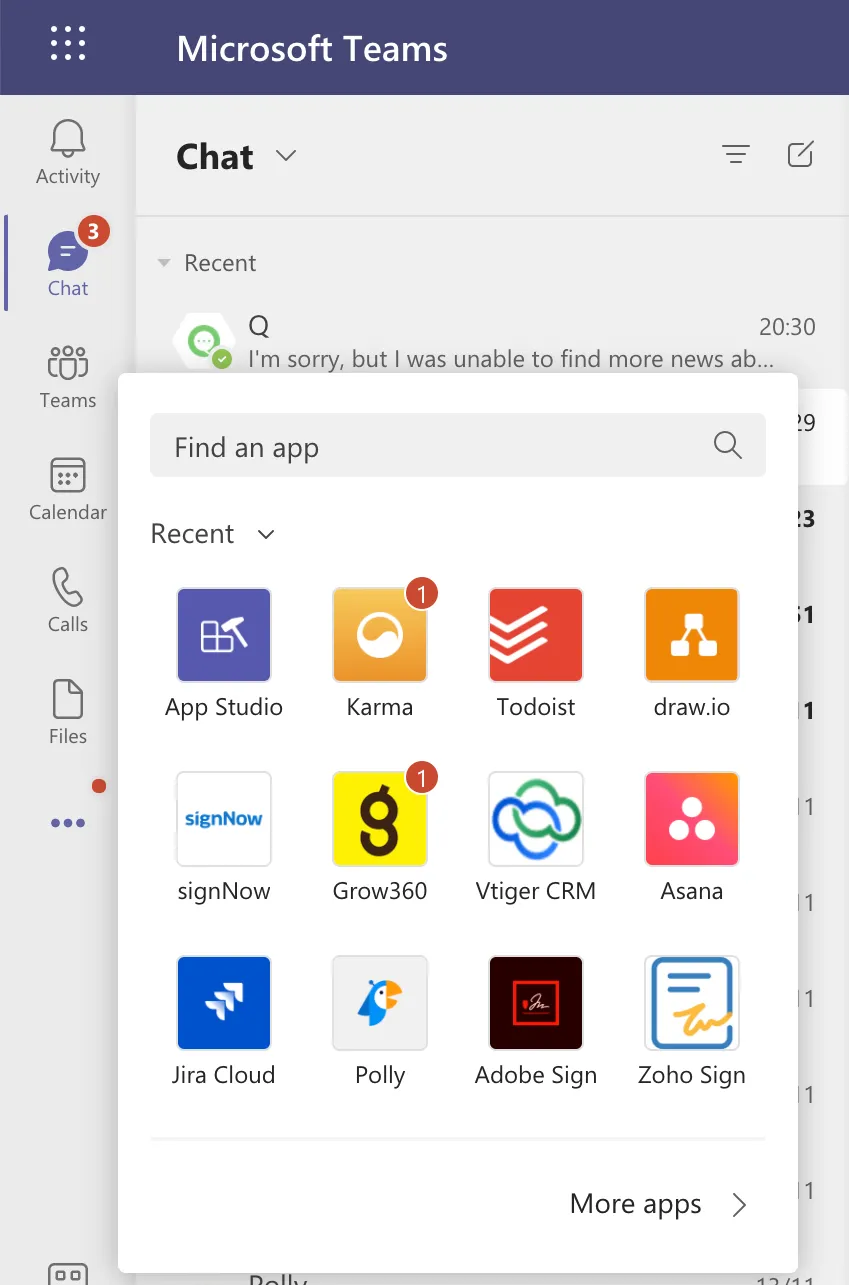
1️) Launch App Studio
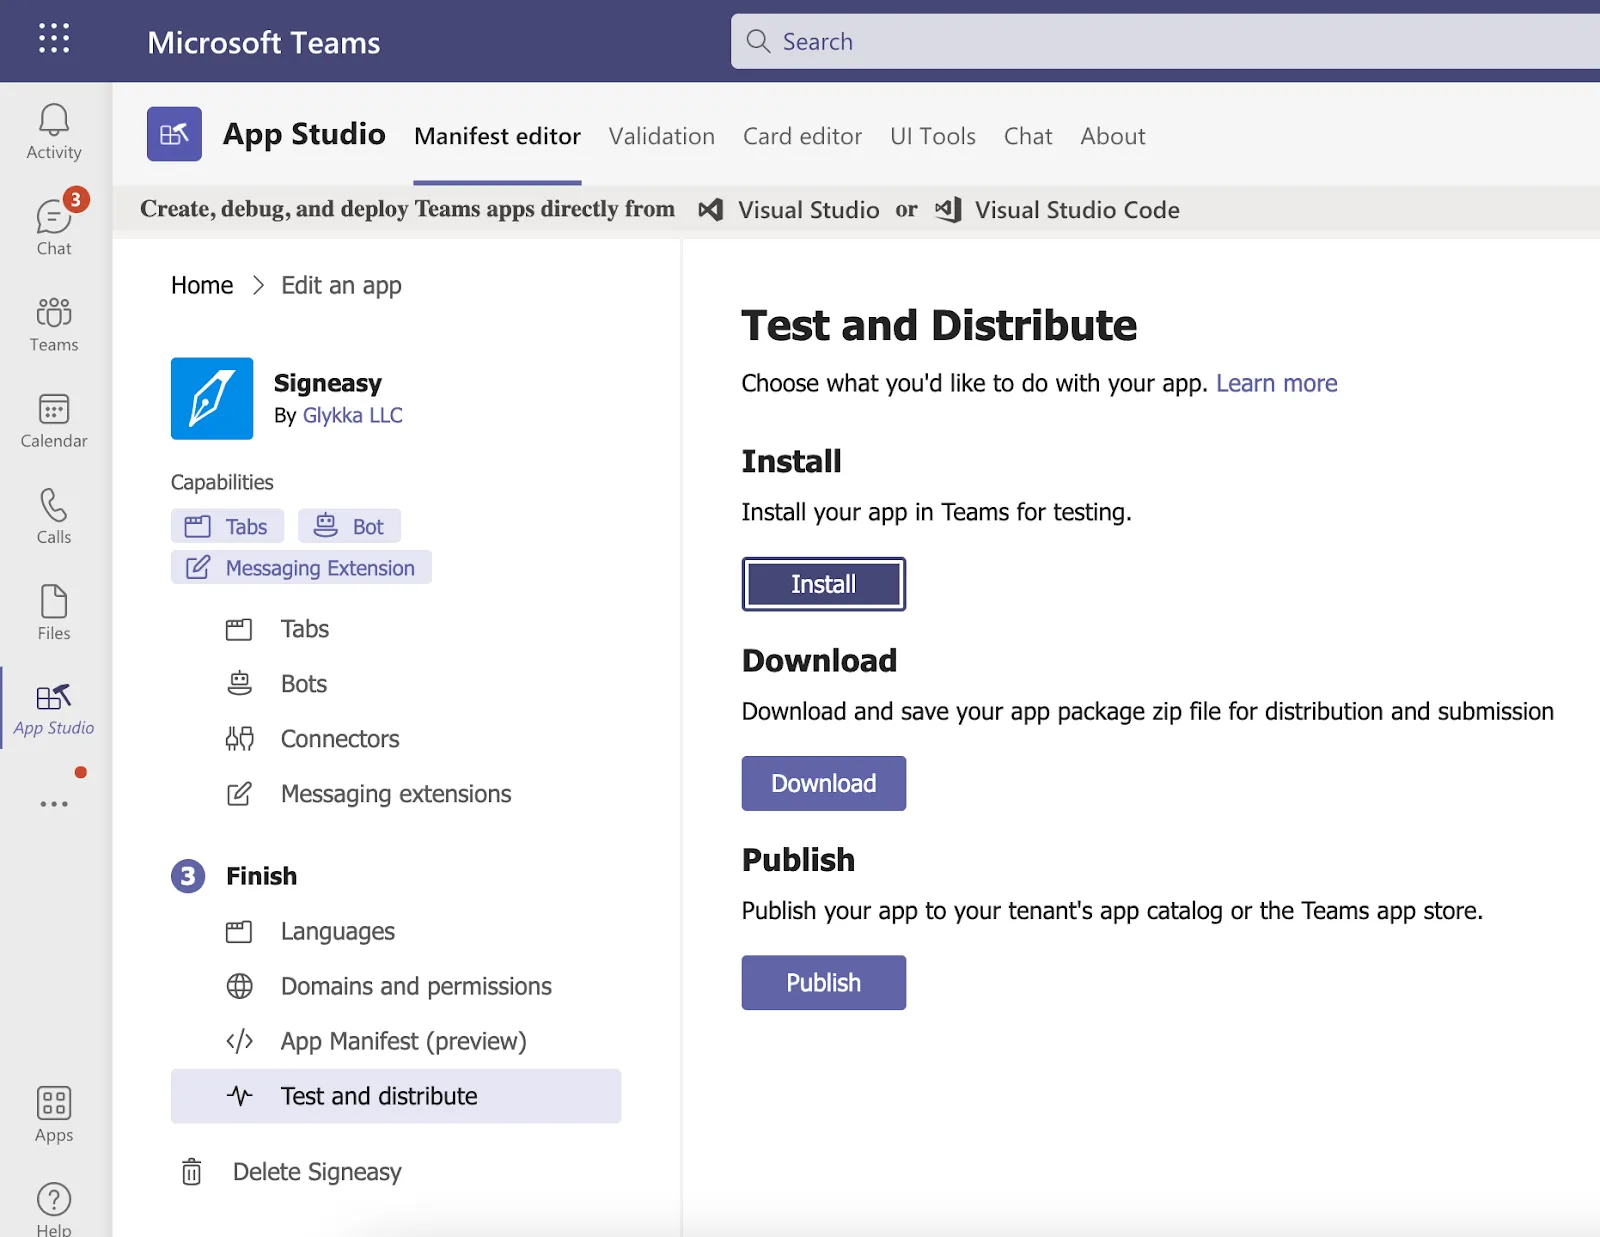
2️) Import com.signeasy.teams.extension.zip

3️) In App Studio, Test and Distribute > Install
4️) With Signeasy for Microsoft Teams 2.0, there will be two options to choose from.
- “Add” installs the personal tab and personal bot
- “Add to a team” installs the messaging extension and channel tab
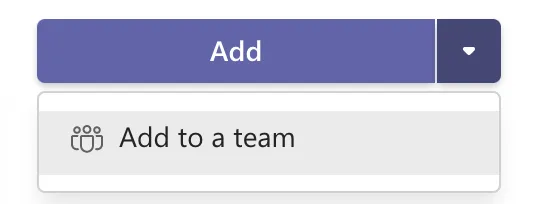
5️⃣ If you choose "Add to a team," there is an extra step to complete. In the next window, select a team, then click “Set Up”.
Post Release: The Delight
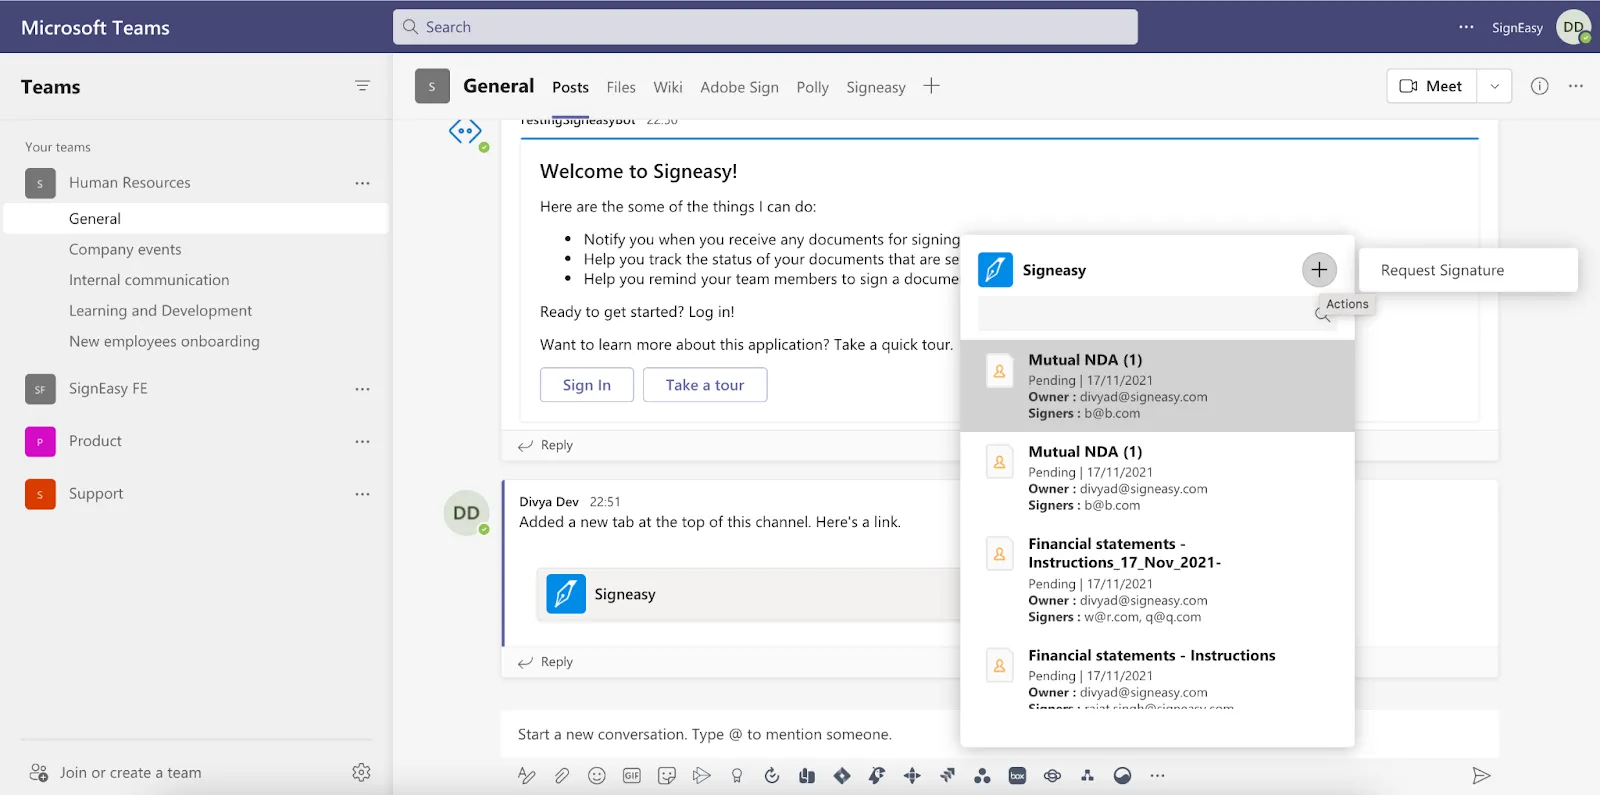
Messaging Extension in Channel Scope
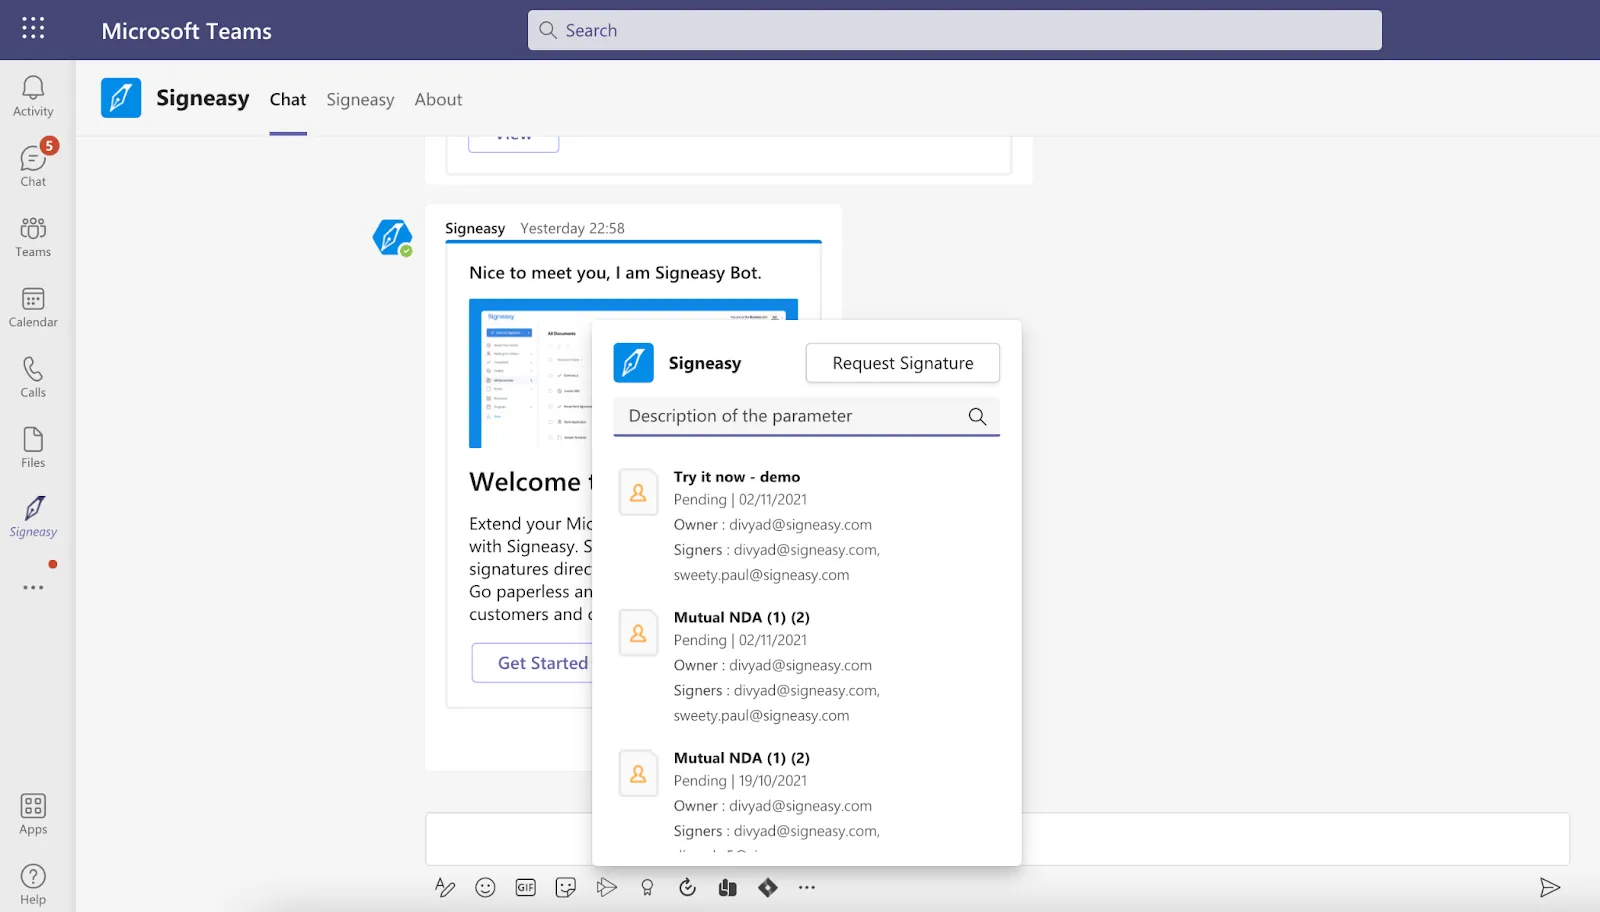
Messaging Extension in Personal Scope
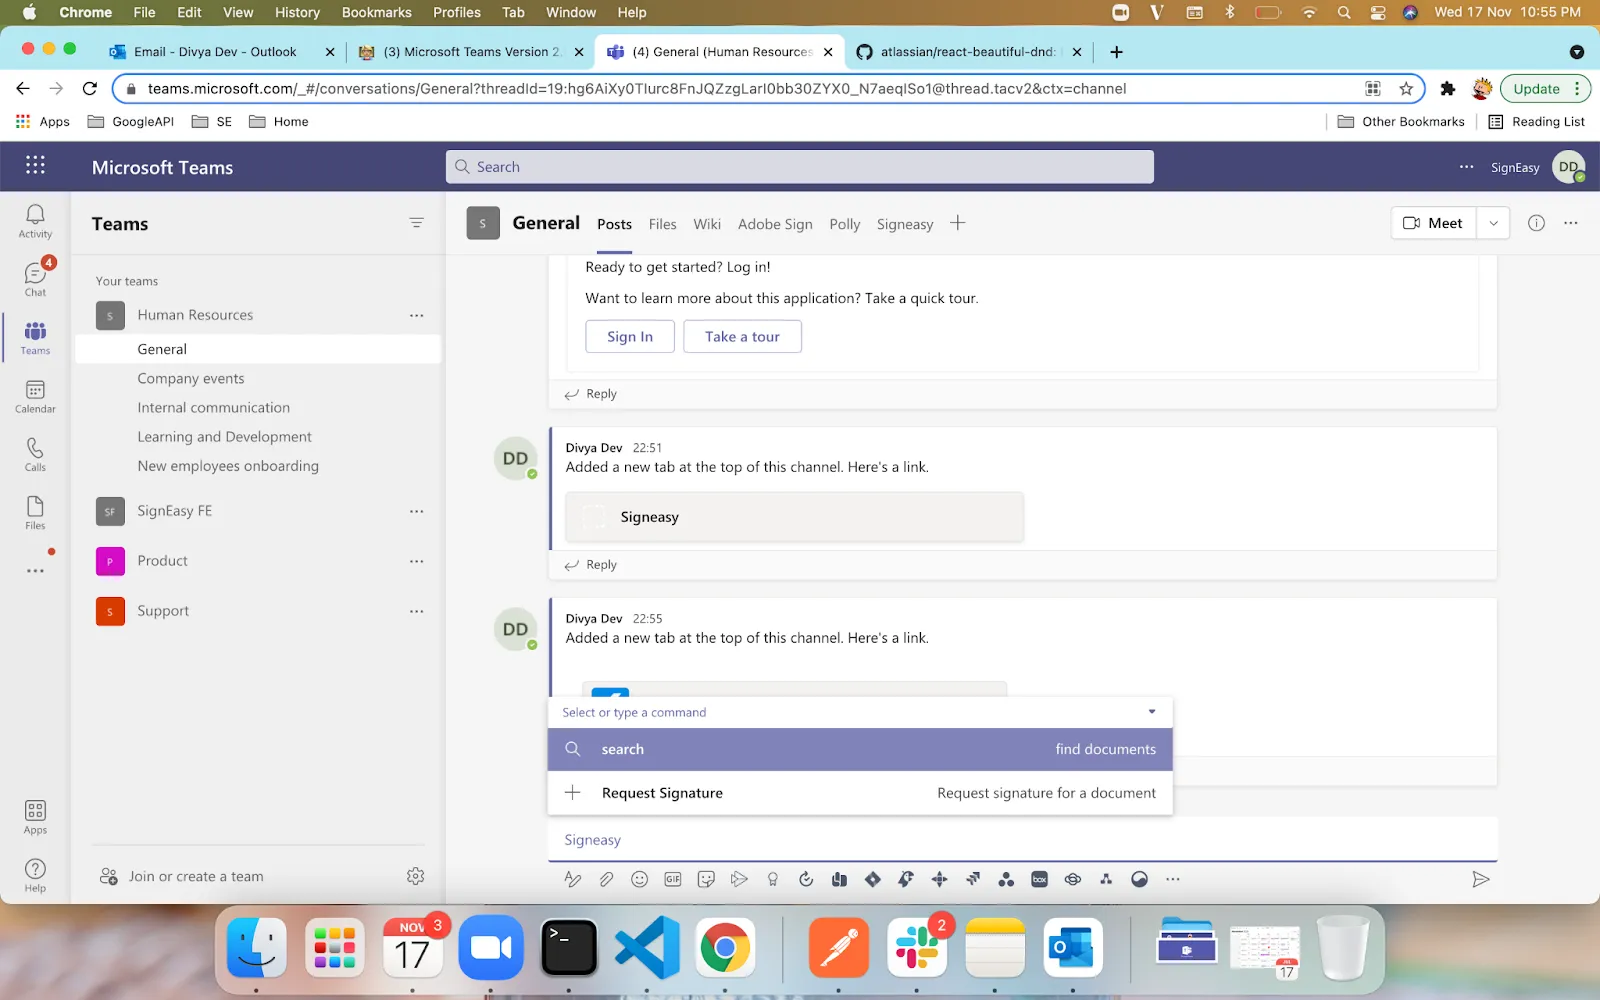
Commands in Channel Scope
It all begins with @Signeasy in the new conversation text field. Users can search for documents and request signatures.
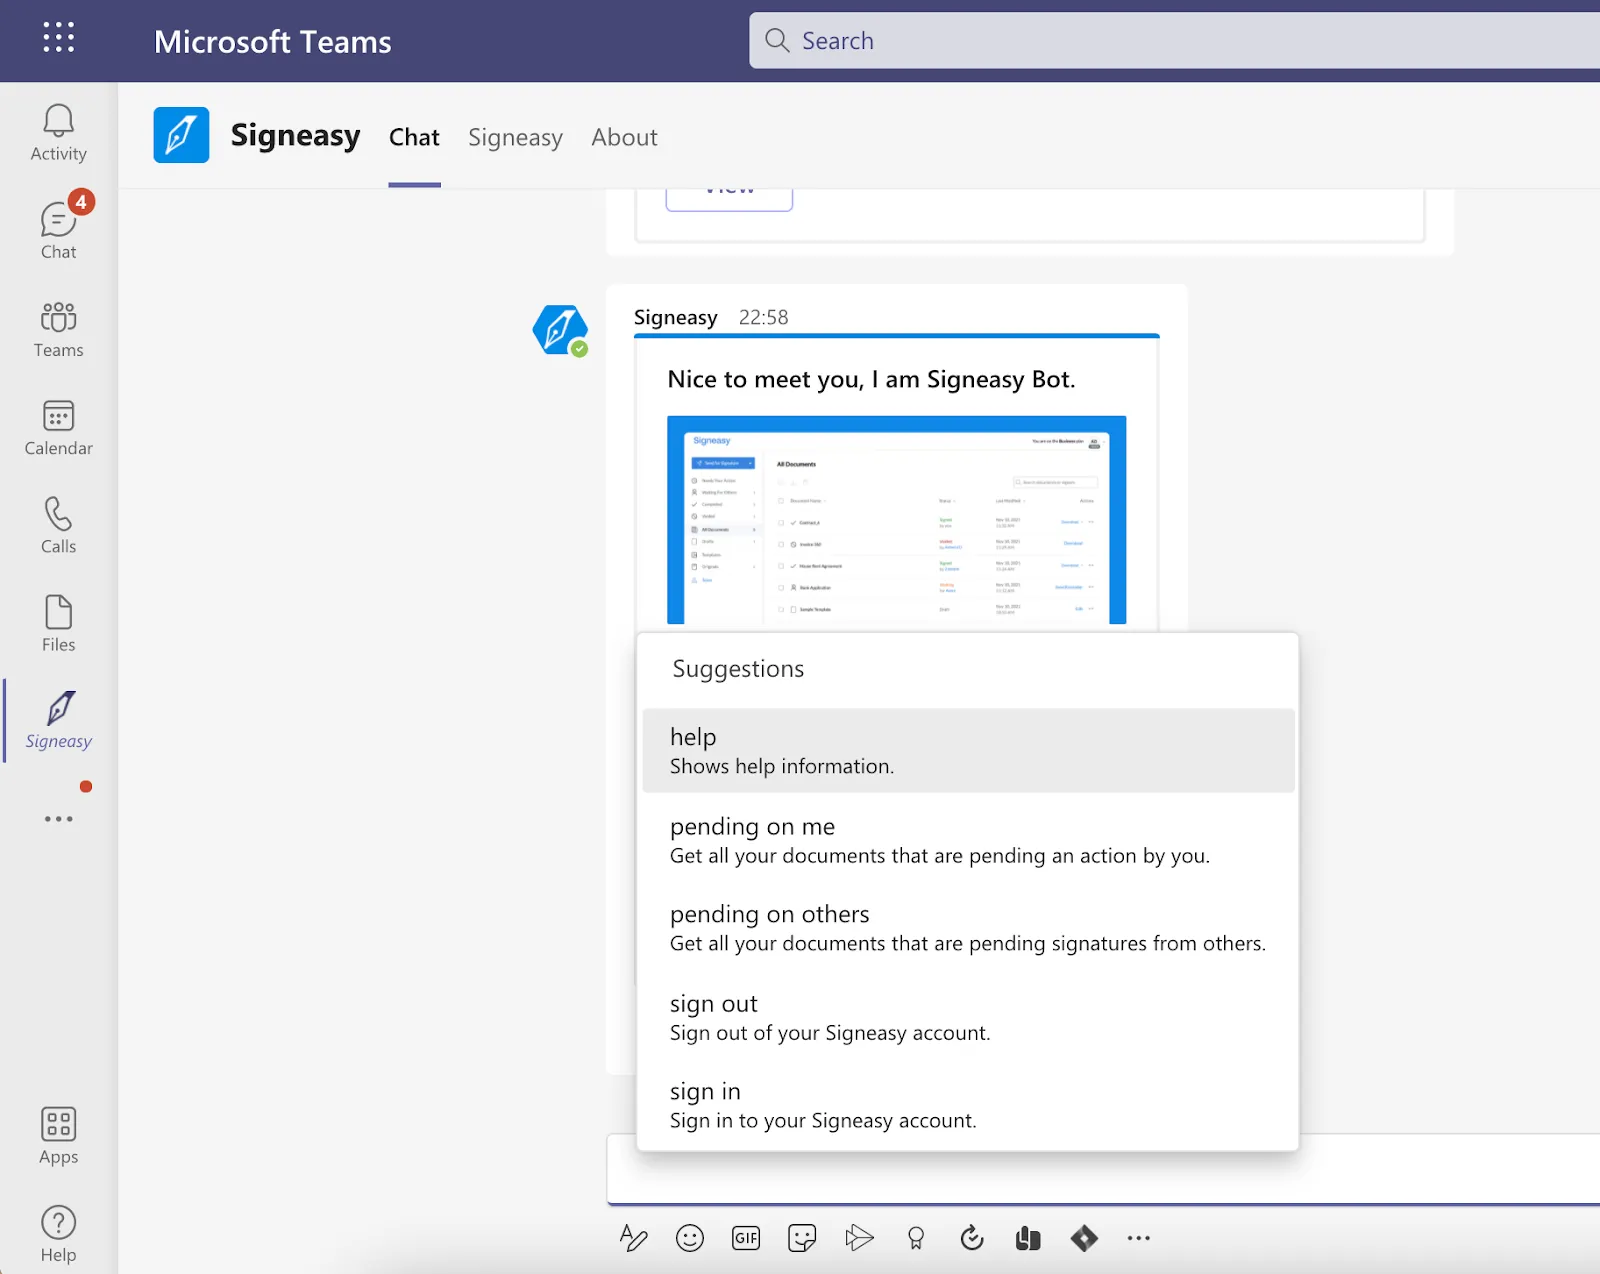
The Personal Bot
And, By the Way...
During the development process, we found a couple of interesting behaviors in the Microsoft Teams platform. Microsoft is renowned for being developer-friendly, so we have the freedom to report any issues faced during development. As enthusiastic developers, we made sure to report every odd behavior we experienced along the way. Consequently, these issues were acknowledged as Microsoft bugs.
Links to the issues are:
1️⃣ https://github.com/MicrosoftDocs/msteams-docs/issues/4555
2️⃣ https://github.com/MicrosoftDocs/msteams-docs/issues/4425
👷 Developers
Abhay Thakur
Tanvi Baranwal
Sarav Thangaraj
Divya Dev
Rajat Singh
Venkatesan Ethiraj
✍🏼 Creators
Sweety Paul
Gowtham S
🤝 Collaborators
Jijoy Chandrachoodan
Sujan Balachandran


.webp)
