[Update: We have released the Request Signature feature on iOS and Android. Find out more here.]
Days ago, we introduced the Request Signature feature on Signeasy for Web. This helps you to request anyone (even a non Signeasy user) to sign documents online and send the document back, within minutes.
To help you get acquainted, we have prepared a walkthrough to get you started.
How do I request a signature?
To request a signature by importing a document start by selecting the start signing option and then select the Request Signature option, as highlighted below.

You may bundle multiple documents together in a single signature request, by selecting multiple originals, or uploading multiple files from your computer.
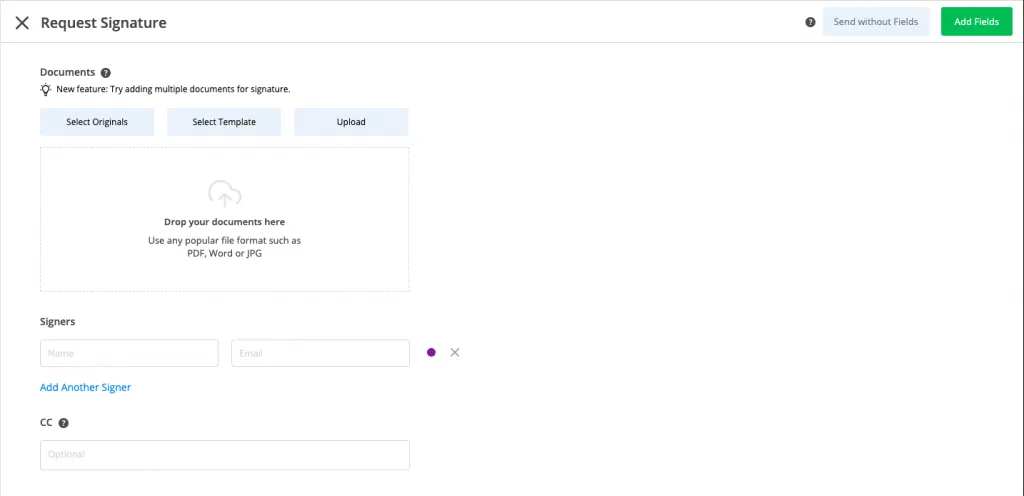
You may also select the sign option next to the document name and click on the Request Signature button as highlighted below.

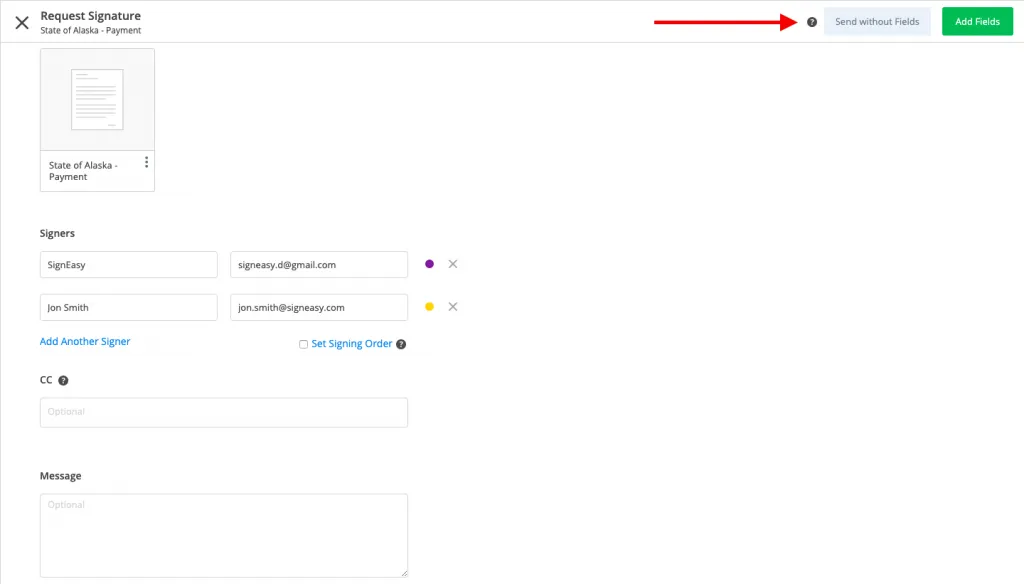
Add the email addresses and names of the recipients of the signature request. You can also add an optional message for the signers. If you don’t have a physical copy handy, you can sign PDF online directly before sending.

Once you’ve sent the request, you can stay updated on the progress of the signers by reloading the web app window. Click on the link next to “Waiting for” to view the status of the signers.
Once you’ve sent the request, you can stay updated on the progress of the signers by reloading the web app window. Click on the link next to “Waiting for” to view the status of the signers.

How does a signer view the request and sign the document?
At the signer’s end, they will receive an email notifying them about the signature request you have sent

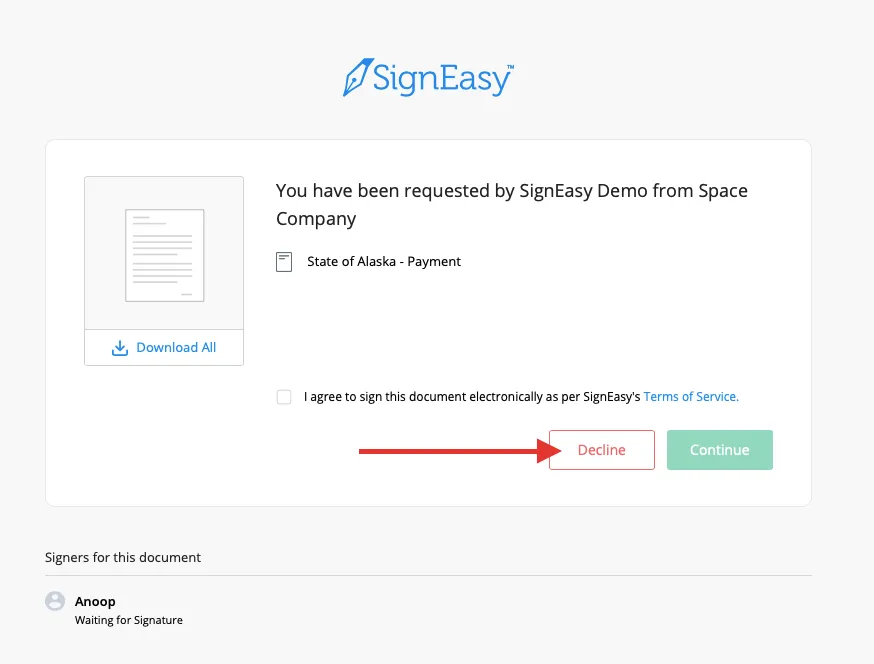
On clicking the link provided in the email, they will be taken to a landing page where they can choose to sign or decline the request. They can proceed by clicking on Continue.
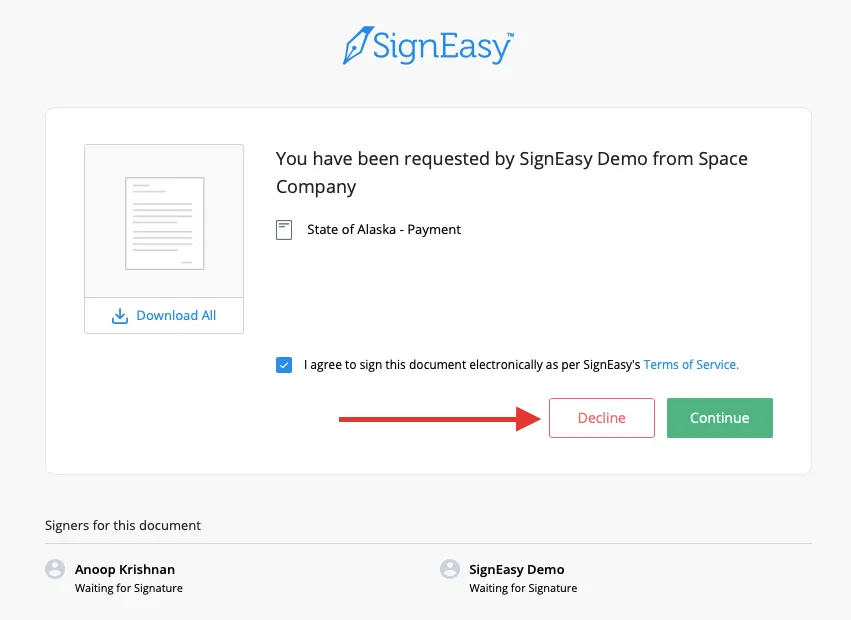
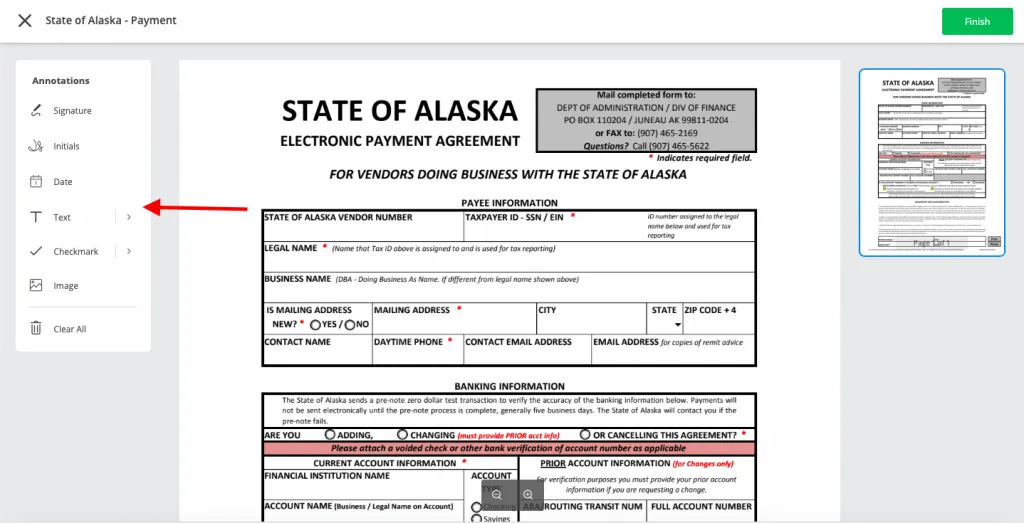
On clicking Continue, they can view and sign the document, and add signature, initials, date, and text.
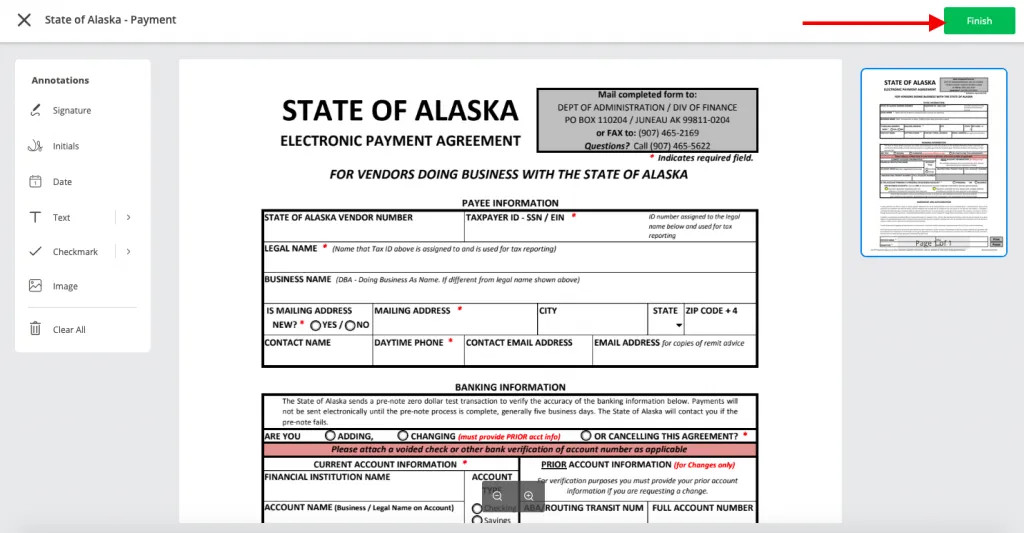
Once the document has been finalised, they can click on Finish to complete the document.
Once the document has been sent successfully, the signer will be taken to a page to inform them that the signature request has been completed, along with the other signers in the request flow.
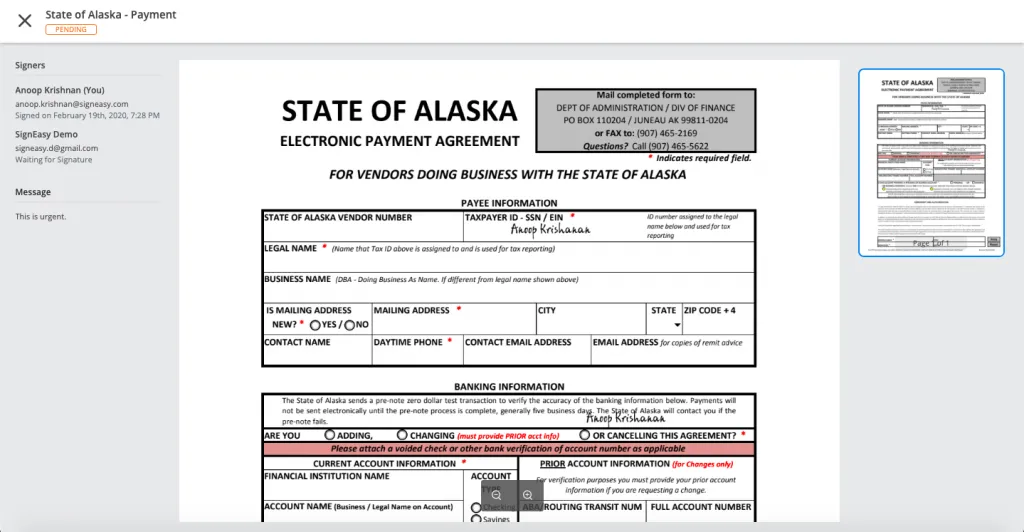
The signer has completed the document, what’s next?
Once the signers have signed and sent the document back, all parties will be notified by email, and receive a copy of the signed document, along with the signature certificate. You can view the completed document on your Signeasy for Web dashboard, in the ‘Completed’ section.
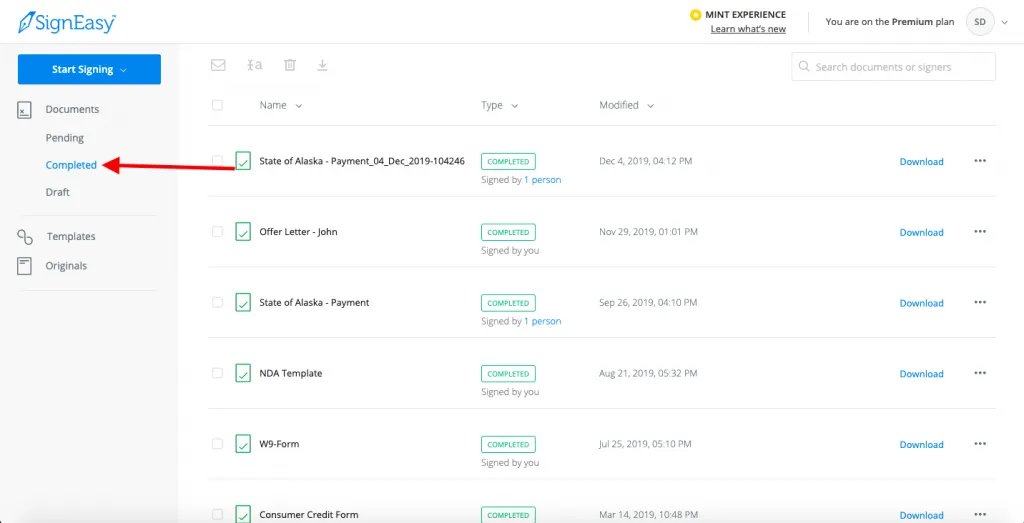
Have a document in your inbox that needs to be signed?
Check out our step-by-step guide on how to sign documents sent by email.
Advanced options
How do I remind a signer to sign a requested document?
To remind a signer to sign the requested document, you can click on the Remind option to send an email reminder.
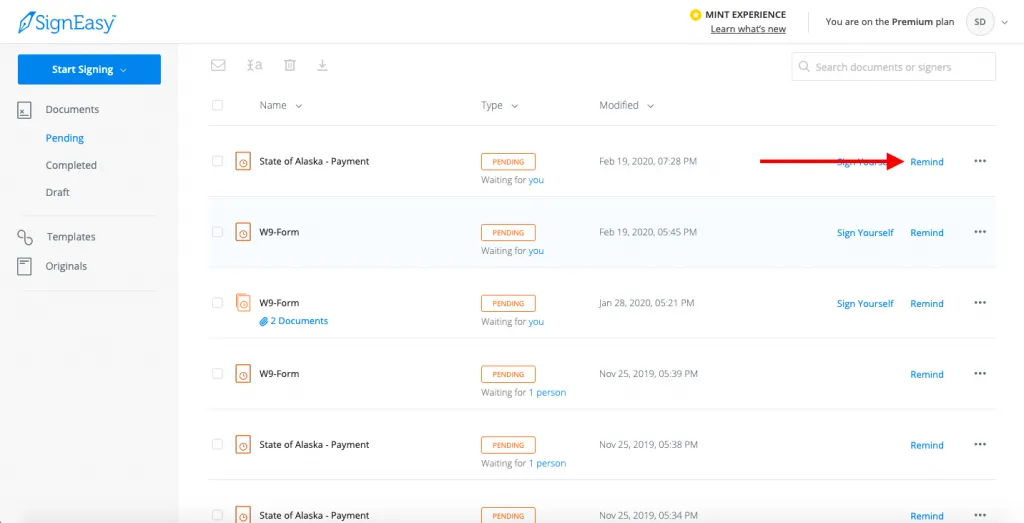
How do I cancel a signature request I have sent?
Sent the wrong file? Or sent a request to the wrong person? Worry not. To cancel a sent request, click on Pending in the right side Menu. Click on the hamburger menu option at the far right of the document to view options. Select Void.
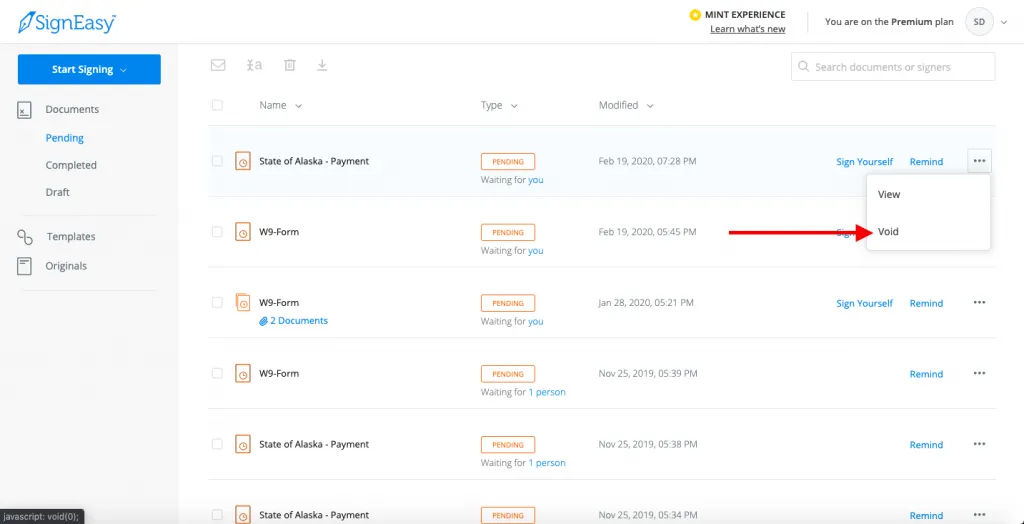
Click Void Request to confirm the cancellation of the signature request.

Can a person decline a received signature request?
A person who has received a signature request can decline by clicking on the Decline option.
How do I add more signers in the signature request?
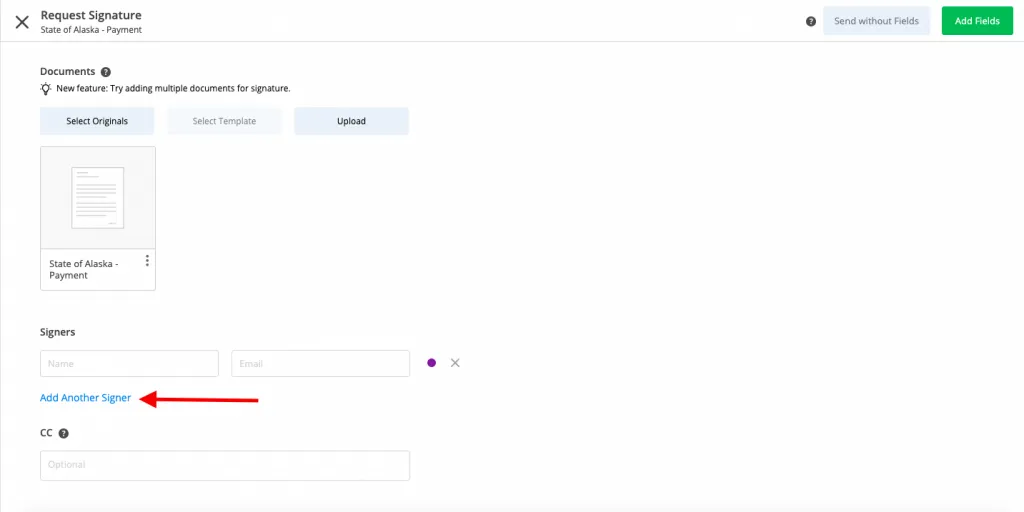
You can add any number of recipients by clicking on Add Another Signer. They will be sequentially added to the signature flow.
And if I want to remove an added signer?
To remove an added signer, click on the cancel option at the right.

How do I add myself to the list of signers?
If the document requires your signature as well, you can select the Add Yourself option which appears when you select the name section, to add yourself in the list of signers.

What if I want to change the order of the signers?
To change the order of the added signers, select the “Set Signing Order” option, and you can use the hamburger menu option next to the signer’s email to reorder the list by dragging.

Now that you’re ready, let’s get you started with your first signature request on a document now.


